Atomstack P7 M40 Laser Engraver | Unboxing | Setup | Test | Review
one of the tools i’ve been wanting to
buy for a while now is a laser engraver
coincidentally i was recently reached
out to by adam stack officials to test
and review one of their newer laser
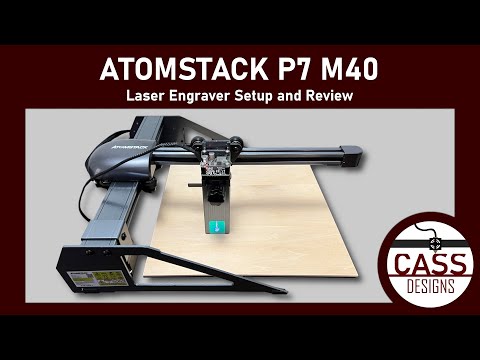
engravers the atomstack p7m40 which is a
portable laser engraver with cutting
capabilities
it engraves and cuts up to 200 by 200
millimeters with its 5 watt laser and is
advertised to be able to engrave wood
steel glass and opaque acrylic and able
to cut wood and opaque acrylic in this
video i’m going to unbox and set up the
laser engraver and get started testing
it out i’m going to test the engraving
quality on wood and steel and the
cutting capabilities on wood and acrylic
now as i said before i’ve been wanting a
laser engraver for a little while now
but i’ve never actually used one so this
video should show how easy or difficult
it is to use this product if you’ve
never used a laser engraver before
before getting started with the unboxing
the product and store links are included
in the description below
the p7m40 came in a relatively small
package with
all the parts
the first thing in the box is some
shielding to put under the material
you’re cutting so you don’t damage your
work surface when the laser cuts through
followed by a detailed instruction
manual to help guide us through the
assembly and setup process
it comes with a usb cable to connect to
a computer a belt for one of the axes
the fasteners and other hardware to
assemble it some test pieces to engrave
or cut a small piece to position the
laser above the material being cut the
frame and the laser itself
now this product is advertised as a
portable laser engraver and based on the
size and weight of it i can see how it
is the frame is made up of aluminum
extrusion with thin aluminum sheets on
the sides and is minimalistic without
any unnecessary structural features to
increase the size or weight
let’s get started putting this thing
together the instruction manual has five
steps to follow that look pretty simple
step one is to connect the x and y axes
by sliding the head that has the atom
stack logo on it onto the other rail
you’re going to want to loosen the nuts
that are on the rollers before
connecting then slide the pieces
together and tighten the roller nuts
back up to get rid of any slack
step two is to secure the x and y axis
rails to the sheet metal frame pieces to
make sure everything is correctly
aligned you can use the platforms that
come with the engraver to hold
everything upright while using the
screws in the bag labeled step 2 to
fasten the frame sides to the rails
step 3 is to screw in two bearings and
wrap the belt around the motor and the
bearings
to make sure the belt is as tight as we
want it we can loosen these two screws
that hold the motor in then tighten them
when the belt is at the tightness that
we want
for step four we just slide the laser
itself into the rail block as so
and then tighten it with a thumb screw
on the side this thumb screw is how we
secure the laser at different heights
depending on the thickness of the
material we are engraving or cutting
also during this step the manual says to
add the foam pads to the corners of the
frame
the final physical step which is step 5
in the manual is to connect the cabling
of the components as shown in the video
right now
now it’s time to install the software
this engraver can be used with laser
grbl as well as light burn and probably
other engraving softwares that i’m not
familiar with but i’m going to start out
with laser grbl because that’s what it
suggests in the instructor manual this
part was easier than i expected just go
to the link in the description and
install laser grbl
then open it up click tools and install
ch340 driver the manual suggests that we
restart the computer after installing
this driver so do that before trying to
engrave anything
once the computer is restarted we’re
ready to get laser engraving to connect
the software to the printer click the
lightning logo and once the logo turns
into the red x you’re all connected
also needless to say you have to connect
the engraver to your computer with the
usb cable included with the engraver
with everything assembled and connected
it’s time to do a real-time first
engraving test on the wooden piece that
came with the engraver
i’ll use a png file of my logo in laser
grbl and set it to 1-bit bw dithering to
do a simple horizontal line version of
my logo i’m following the instructions
from the manual and for wood engraving
i’m setting the power to eighty percent
and the speed to three thousand
millimeters per minute setting the
vertical height of the laser with the
alignment piece and then making sure the
wood piece is in the area that the laser
will actually engrave while being on top
of the shielding just in case
laser grbl allows you to move the laser
and click focus to emit a low power
light and ensure that your material is
under the laser for the image or text
you are trying to engrave there is even
a frame function that emits a low
powered laser and moves along the edge
of the image to ensure that you have
your piece that your engraving properly
aligned
before getting started i wanted to point
out the blue light filter that is in
front of the laser this helps avoid
damaging your eyes by blocking most of
the harmful light emitted by the laser
however even though this does a good job
i highly recommend buying laser eye
protection whenever you’re dealing with
concentrated beams of light like this
this laser has a good filter installed
already but it’s better to be safe than
sorry once everything is all set it’s
time to click run i’m having this part
of the video run at three times speed to
save some time but this engraving took
about a minute this thing goes pretty
quick and is extremely easy and
intuitive to set up the quality of this
engraving is pretty good but i did have
it set to three lines per millimeter
which is kind of a low resolution and i
didn’t use an extremely detailed image
so it’s time to play around more with
this now that i have it all set up and
can really test what this thing can do
but after engraving wood in my apartment
and almost setting off the fire alarm
let’s test out the true portability of
this thing and use it on the deck
let’s start out by engraving more wood i
bought these 1 8 inch thick 4 inch
square wood pieces to make some engraved
coasters for my friends i’m also going
to use these to test out some geometric
shapes as well as detailed photos
here’s an optical illusion coaster that
i made with the engraver with seven
lines per millimeter powered to 75
percent and set to 3000 millimeters per
minute for a speed
you can set the engraving resolution
within laser grbl manually to make it
higher but i found that seven lines per
millimeter seem to be good for most of
what i made here’s a detailed photo of a
mountain in a lake to show this engraver
using variable power to create images
like this in engravings
they came out very fast and looking
pretty awesome
next i wanted to test out cutting wood i
found a python script powered laser cut
box generator called boxes.pi and we’ll
link it in the description this script
creates svg files of various box designs
that can be cut out from wood with
really cool accordion style hinges i had
to test the settings out a few times but
ended up cutting a 1 8 inch thick piece
of wood by setting the laser to 100
power and the speed to 200 millimeters
per minute once it’s cut the pieces pop
out pretty easily and i can assemble the
box
after successfully cutting wood i wanted
to test cut one of the acrylic pieces
provided with the engraver i have to
play with the settings a bit more but i
was able to easily cut the acrylic with
100 power and a speed of 400 millimeters
per minute also if you’re enjoying this
video and want to see more from this
laser engraver and other videos i work
on feel free to like the video and
subscribe to my channel usually i post a
lot of 3d printing videos and projects
that i’m working on and post monthly so
if this is the first time you’re
watching one of my videos welcome
anyways let’s get back to the laser
engraver the next test is to engrave
some steel i ordered 26 gauge stainless
steel and covered it with dry erase
marker using a dry erase marker or
something similar applied to the top
surface will allow the engraving to pop
out more i covered a small area with the
marker and printed a vectorized version
of my logo
it came out very crisp and visible and
i’m honestly pretty impressed with all
that this portable laser can do
overall i think this laser engraver is
awesome it’s extremely portable since i
was able to easily move it outside
whenever i wanted to engrave or cut to
use it in a well ventilated space i
currently live in an apartment so this
aspect of the engraver is very well
appreciated for my situation the
operation of this engraver is also very
intuitive and can be used with at least
two softwares laser grbl which i used in
this video in light burn the wood
engraving quality is insane to me and
it’s extremely easy to cut wood and
acrylic also having the ability to
engrave steel in such a small form
factor is amazing
i can’t say enough good things about
this laser engraver again i am new to
this hobby so a more seasoned laser
engraver veteran might have some gripes
with it i plan on using this for a few
months and posting a second review video
to show off some things that i use it
for and include a more long-term review
of the product
thank you so much for watching the video
and thank you to adamstack official for
sending me this laser engraver to review
check out the links in the description
if you’re interested in getting one like
the video if it helped you on your laser
engraver search and subscribe to check
out more of my videos also follow me on
instagram to see my projects before they
get posted and join my discord server to
join the growing community
thank you again and have a great rest of
your day
you