Forspoken | Create An “OVERPOWERED” Combat Build Early
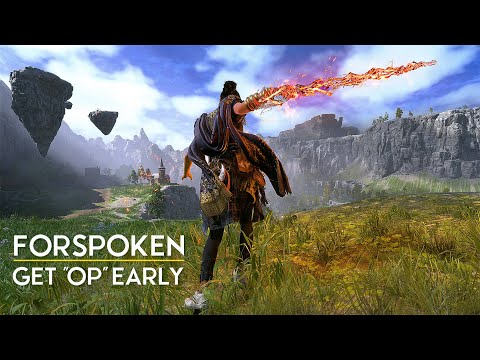
for spoken starts out as a ranged spell slinging game but I bet some action rpgers out there would prefer a more traditional close range melee alternative or just a powerful early game build so I’m gonna show you how to beeline it straight to some really strong upgrades and give some Advanced combat tips as we go through this I’m also going to show you how to easily get some gear that will stack red magic modifiers which will synergize nicely with this build in other words more D in your DPS that sounded better on paper if you
follow this guide right after you leave the main city gate for the very first time at this point pretty early in the game you’re going to be having a better time with a combat system and exploration guaranteed and hey if you happen to be new here and are into open worlds and RPGs hit subscribe now before I get into the rundown of the route you’ll need to take here are the basics of what’s powering this build this will primarily focus on the spell slice Arc slice and rage slice instead of shooting little projectiles red magic
will change your basic attack into a short range sword swap when you have Arc slice toggled charge attacks do a strong wide slash right in front of you can also
frequent charged attacks but more on that later the other main melee attack of this build is the pugilist style rage slice holding a charge with this toggled will send you into a sequence of quick short range punches ending with a fiery blast you can also press the left stick in different directions during this to modify the movement of this combo for support magic that works really well with a close range play style go with the skill charge this will send you flying forward quickly closing the distance while dealing damage since your basic attacks hit so
frequently with this build it recharges the support spells like this pretty quickly the skill Bombardier is also pretty good which is a short range kick but the enemy detonates when they hit the ground this channel is my full-time job and that currently just entailed kicking Wildlife to create an exploding deer grenade I made it The Crucible skill is another one you might want to grab as well if you want a bit more damage output those are the skills I recommend you get first for this build but now it’s time for the actual tutorial in chapter
4 don’t worry that’s just a couple hours into the game you’re let out of the main city for the first time and are tasked with heading south east to take on the first real boss you’re going to be just following the main quest waypoints from here on out which will take you down to this red Castle area simply running straight there and avoiding everything else will take you about 20 to 30 minutes since there are some required fights along the way but here is a summary of what you’ll be doing first Waypoint you just have
to travel through this tunnel you don’t even have to fight those guys so do it if you want then you’re gonna head straight through this desert area and try to pick up those glowing Mana things because those will refill your stamina so you can Sprint for longer you’ll then come up to this weird blue whole Vortex thing and enter it into the next area here you’re gonna stop off at this location on the way to the next main objective that will lead you right to the Mulberry found jump in and swim around in some questionable
liquid and you’ll emerge with the spell shimmy now you can hold down the parkour button and press jump every time you land to travel faster than normal this is actually one of the best ways to get around in the game and it doesn’t even sap your stamina at the next Waypoint you’re gonna have to kill both of these wing nights before you can progress hitting them dead on with your current magic will be resisted so lock onto either of their wings instead which hits for full damage and even knocks them down those down strikes will
also give you some health back for all this early game combat I highly recommend you upgrade the burst shot all the way up as soon as you can charging up that burst shot spell to its highest tier launches a very effective AOE explosion however the best way to succeed with this combat system is to shortcut to those fully charged attacks instead of just sitting there slowly accumulating a charge after a sequence of basic attacks out of attacking from parkour or from casting some support skills charged a tax will instantly power up to their highest tier
right after that this makes it so you can do frequent blasts of Max charged up skills and some gear you can find later on even imbues your charged up attacks with status effects win-win doing this charge spell shortcut works really well with those melee attacks from earlier as well alright you should be better at combat now back to the walkthrough next you’ll be heading through a corrupted area for a bit and then you’ll be presented with a group of Shield dudes either attack them from behind or do charged attacks to knock them down then you’ll
enter the main Castle town area and stick to the rooftops if you can then you’re gonna have to fight a winged Knight plus some Shield dudes but you already know how to take care of that situation wrong entrance I guess your next Waypoint will then take you to an alternate way in the castle cue another fight against this group which you should be pro at by now and then enter the red interior building but wait actually head back out and restock your healing potions before it’s boss fight time by default hold down on the d-pad
to plop down a campfire which also lets you craft and restock your healing now that you’re prepared head through the red building which will kick off the first major boss battle this boss doesn’t hit too hard at the start so this first part is pretty easy the next part Shield dudes will enter the mix but you can avoid them and focus on the boss or take them down individually first third phase there’s always got to be a third phase this is where the fight gets a bit harder holding down the parkour button will help you
avoid this lob of fireballs at you and when the floor is hot lava get to some of the elevated stone structures on the side that boss is done so and you can absorb their red magic type giving you access to those close range melee attacks from before this also gives you one of the main traversal mechanics which lets you go just about anywhere you want now this is really the best time to start doing side content and explore next some gear so head directly west from that castle to the militis academy clear that and you’ll
receive this stylish cloak which has a high red magic stat to increase your melee attack power then head directly north from here to Fort Optima you have to come up and around from the back to reach this place by the way clear that place and you’ll receive the Passion Nails which boosts red magic damage by five percent and by even more depending on how many spells of that type you have unlocked then you’re gonna fast travel back to the main city and you’ll need to play through a scripted story section here after you finish that
you’re gonna head to the library in town and talk with this lady and she’ll give you a side quest you’ll need to venture back out to complete this but when you do the reward is this necklace which has a high red magic stat now head on over to a crafting bench or make a campfire then boost the red magic stat of that necklace assuming you have the materials you can also add three bonus modifiers onto this if you found any up to this point you can do this with your cloak as well after you’ve spent
the Mana to unlock the skill amplify you can even fully replace any of the bonus effects a piece of gear comes with so your primary focus should always be on the Gear’s main Health defense and Magic stats then in one of your numerous safe houses your room in town or the library head up to this bookshelf here you can choose bonus objectives to take on to improve the level of your spells definitely take slice which is your main attack and you can also take Arc and rage slice as well for the basic slice attack though
you’ll need to leap over enemies and attack from midair 15 times just hold down the parkour button run into someone and attack from midair pretty easy after you’ve completed that go into your spell menu and upgrade your slice now your main melee attack does permanently more damage like I said before more d you can then go Venture off and do those for your other spells to make them even better as well but that pretty much concludes this early game build however some enemies are slightly resistant to certain magic types so it’s definitely not a complete
win button every time you take down a major boss you’re gonna get a brand new magic type like this so this is really where everything kicks off now let me know down below if you prefer hanging back a bit with your play style be more of a classic spellslinger or do you prefer being a right up there in the mix flailing away thanks for checking this out today I’m Alex and good luck out there with your fantasy Hardcore Parkour thank you