The Ultimate Bike Storage Solution? Steadyrack Review
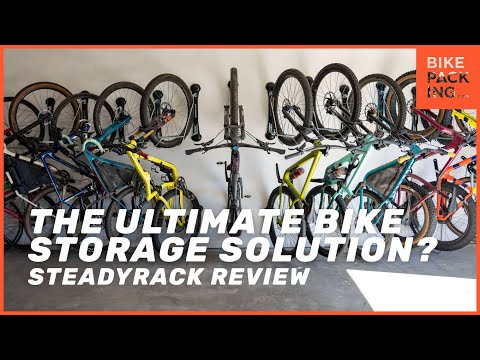
hey everybody so today we’re going to do something a little bit different so this is my garage and behind me is a blank slate or a blank canvas if you will and we are going to attempt to throw 12 bikes i have 12 bike racks right here from steady rack we’re going to throw 12 bikes on the wall i ended up going with steady rack because a few weeks ago i posted on my instagram account what was the best wall storage bike solution out there and i’d say nine out of ten of you all recommended
steady rack so i went with steady rack i have two fat bike racks and then the rest of them are mountain bike racks which should be able to fit uh gravel bikes and mountain bikes i think up to either two point eight or three inch tires so what i’ve done already was i’ve removed a bunch of shelves that were already on the wall i spackled it and then i had to paint it because it was unfinished already so i painted it just basically a similar white to the whole garage just so it didn’t uh clash
i guess so what i want to start with is throwing the fat tire bike racks at the end so in the winter when they come into the garage i’ll be able to
video is supported in part by surly bikes surly makes serious steel bikes for people that don’t take themselves too seriously they make bikes that are versatile and durable that can be dressed up or down for commuting bike packing at being gravel grinding or really whatever you call fun on two wheels with 15 original dirt friendly platforms they offer something that fits just about anyone for any style of riding so for more details about surly you can click this card right here and i also have a link in the description below so before i ordered the
racks i just wanted to figure out the spacing i was gonna go with and what i decided was i was going to set each rack 16 inches apart which happens to be the stud width in my garage here and i think it all worked out pretty well i for sure could have used maybe a few more inches in between each bike but i really wanted to stick to the studs as they have the ability to hold a little bit more weight and if i wanted to throw say a bike packing rig up on the wall
i can easily do that but the 16 inches still gives me plenty of space to rotate through the bikes and actually use steadyrack as it was intended so the install process it was actually really darn easy you do need some basic tools like a drill drill bits a level that might not be something you have i ended up borrowing one and a tape measure there’s a really good video on steady rack’s youtube channel that will help guide you through the install process and i highly recommend watching that before installing i would say the hardest part
of the process is figuring out where to mount the racks so that you can page through the bikes without too much interference this is one thing i may change down the road but i ended up keeping all of the racks pretty low so they’re not too staggered but you can definitely see they are staggered i did this so that i didn’t have to lift them up but rather i can roll the bike into each rack steady rack recommends mounting each rack based on specific bikes and i did that for the most part but also know
that there are some bikes back here that i currently won’t have in a year and i also get a handful of bikes in for review that i definitely want to hang up here so i ended up mounting those a little bit higher just to compensate for a variety of wheel bases so because of that i do think if steady rack added some sort of a sliding system where the rack itself could slide up or down three or six inches that way you don’t necessarily need to put new holes in your wall but by using these
rear wheel holders that are all mounted at the bottom it does give you a wider range when rotating which is super nice plus it doesn’t scuff up your nice white walls i was actually thinking about adding some sort of wood paneling at the bottom just to protect the wall but the rear wheel holders are actually a pretty integral part of the rack so i wanted to keep our bikes here in the garage a little bit organized because i like organization a little bit at least so the drop bar bikes are down here and the flat
bar bikes are over here and i think it actually worked out pretty well as far as staggering and everything like that so i lean the drop bars all the way to the left and then in the middle it straightens out and all the flat bars are all the way kind of staggered to the right this really helps when we just want to remove bikes having this center space kind of separate each side so speaking of different tire sizes the mountain bike rack the mtb rack worked really well all together they fit 2.8 inch tires but
from time to time i do notice the 2.8 inch tires with some really beefy side knobs they do get stuck but if you have a tire like say the wtb ranger 3-0 that would definitely fit in these racks so on the skinny side of things if you know you might be using these racks for both mountain and gravel size tires going with the mountain specific rack over the classic is probably a wise decision the gravel wheels and tires fit just fine there’s a little bit of play in them but they still work really well and
the fat tire biker racks work great they fit both 27.5 by 4 and my 26 by 4.8 inch wheels with no issues so after using the racks for about a week now i’m really happy with how this whole system has worked out it’s super easy to roll the bikes into the rack maybe a little bit more difficult to remove some bikes that have maybe a beefier knob tires but rotating them has allowed me to put fewer bikes in a smaller space which has created so much more space in my garage i just can dance i
can dance all day well i have yet to test many other systems besides uh you know those garage hooks i like the fact that you can rotate the bikes in both directions install the bike with ease and when you’re not using them you can fold them up to make more space for other bikes around steady rack is not cheap by any means but you pay for what you get for my research they offer the widest range of rotation they’re sturdy and steady while also being able to hold a fully loaded bike plus they also come
with a five year warranty and they really tie the garage together make it organized helping me create more space for other things here once i’m finished maybe i’ll do another video on the whole garage and all of the organization i still have a little bit to do but i’d love to open it up to you all what is your go-to bike solution for your garage inside your house for smaller areas for bigger areas let us know in the comment section below as always thank you all so much for watching and until next time pedal further