Ultimate iOS 16 Home Screen Widget – TUTORIAL
This video is brought to you by Brilliant! Two weeks ago, I released a video about my Ultimate iOS 16 home screen, and in it, I featured a widget that has caused a lot of hype. Over 300000 views later, there was one prevalent comment that stood out! I think it’s time to show you how I created this Widget. Instead of recreating the same one, however, I decided to design something different that follows absolutely the same principle and structure. You can hopefully get inspired and create your rendition by looking at both widgets. So, grab your snacks because
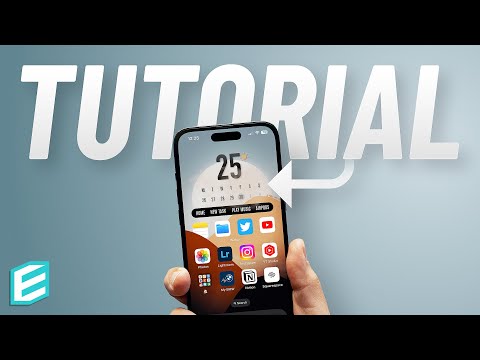
this will be a longer-than-usual video, and let’s dive in by first overviewing the Namib Desert Widget. OH, before I get too excited, I will pack the new Widget in a product for those who don’t like to tinker and just want to install it and support a creator while at it. Let’s go back to the overview I called this Widget the Namib Desert. It comes with a bespoke wallpaper bundle for both the lock screen and the home screen, and it has 10 areas you can interact with. At the top, we have the current outside temperature with
a dynamic weather icon that displays the weather conditions. Tapping on it opens the weather app. Below is my beloved weekly calendar that shows the weekly day and dates, which is interactive.
very requested shortcut. It triggers an instant connection to my AirPods. Even if my AirPods are connected to another Apple device, I instantly bring that connection to my phone thanks to this shortcut. Below the action bar, I have four app icons that open the app they represent. By the way, I love how the depth effect turned out this time. So, let’s build it from scratch, and if you end up enjoying this video, subscribe because WHY NOT?!? Ok, so if you decide to build your interpretation of this Widget, you can use the same overlapping principles I will
show you. Make sure you use high-res images and transparent PNGs where necessary (like the clouds in the sky). If you want to build the same Widget, I have here, follow the DIY Namib Widget link in the description below and purchase the inexpensive materials pack, which has all the bespoke, hand-drawn, and pre-cut components you’ll need. If by any chance, you choose not to build the Widget, you’ll still have two awesome wallpapers to apply to your device. As I mentioned earlier, if you just want to go ahead and install this Widget as is, without having to tinker
to build it, I also have a Namib Widget Complete pack ready for installation. It comes with the Widget itself, all the components and wallpapers, as well as a step-by-step guide. Step number one, place the folder that holds the widget components in your iPhone files app. Step number two, save both wallpapers from the folder in your photo gallery, ready to be applied. Step number three, install the app Widgy Widget from the App Store. Remember, feel free to pause this video whenever you need to catch up with the steps. Ok, so let’s start simple by applying both
the lock screen and home screen wallpapers. Ensure you position the wallpapers without stretching or cropping them because they are vital to the overlapping effects we will add later. If you have a smaller screen iPhone, make sure the wallpapers are alighned to the top, even if it cuts out the bottom. Next open Widgy Widget, and from the first tab, select Create and scroll down to choose a Large Widget. I will quickly go to the third tab, Document, and give this Widget a name and description. Next, I will go to the primary Manage tab of Widgy, where
I will position my newly created Widget in an empty slot to place on the home page. I am putting it in Large Slot 2, but you can place it anywhere you like. Next, I’ll go to the home page and add a new widget. From the Widgy options, I will select Large Slot 2. Going back to the Widget, from the layers tab, we’ll first add a new Image layer. While having nothing in it, I will stretch that image to take the entire space of the Widget since it will hold a transparent background. This way, the Widget
won’t have a black background like any other widget but instead blend in. By the way, you can choose the steps or increments of the resizing and positioning elements by toggling between the small, medium, and large steps. Small comes in very handy for some fine adjustments of the images later. Next, I’ll go to the third tab of the image layer we created and scroll down to Widgy and choose Transparent Background High Quality. This will lead me to a screen where I need to place a screenshot of the home screen to simulate the current background we have
applied. To create this background, go back to the home page and place the icons on your home screen in jiggle mode for a moment and swipe left to an empty home screen. Take a screenshot of this home screen and go back to Widgy to select it as a background. And just like that, the home screen already looks fantastic. This is where the fun starts. Before we do anything else, I will rename my first image layer to Transparent Background. I will urge you to rename all your layers as you build the Widget accordingly so you can
easily manage everything. You’ll notice later that I will rename all my layers as I create them. The next layer is again an image that will hold my first icon. Once I add the layer, I’ll go to the second tab, Image, and choose System and Files to locate the image I have prepared for my notes app. Once I choose the image, I’ll go to the last tab, Effects, and add edge rounding to the icon to match it with the rest of the iPhone apps. I find 20% to be perfect amount of rounding. Then I go back
to the first tab, Frame, and resize the image to 290×290 pixels. Then, I’ll position it all the way down and use the small steps to move it left and right and alight it with the rest of the icons on the iPhone. Note that you can exit Widgy and go to the home page at any time without having to confirm the changes inside the app to test how everything looks. This is how I eyeball if my icons are aligned. Once I am happy with the position of the first icon, I will duplicate it three more times
and align all four icons accordingly. Then, I’ll go to the three duplicated icons and choose the appropriate images from my Files to represent the icons wanted. Some house cleaning is in order, and I will rename all layers accordingly. Next, I will add the little overlapping corner of the dark brown dune to overlap with the Notes app. This image is called Overlay 1, and it’s inside the folder. Positioning this element takes a bit of time to look perfect, but I am happy with the result a few minutes later. Feel free to take my size and positioning
coordinates from this screenshot. Next, I will create my first Tap Layer. As you can probably guess, the Tap Layer allows you to tap on an area to trigger an event. In my case, I want to place four tapping areas for the respective icons and trigger them to open the apps they represent. Setting tapping areas is very easy. Once positioned and resized, the tapping area gives you a list of official Apple apps or 3-rd party apps that you can select from, but remember that not all apps are listed there. If the app you want to open
is not there, you might want to change the app or maybe use a shortcut to open it. This will happen to me in just a moment as I realize I am not able to trigger the camera app. To avoid using shortcuts, I will replace the camera app with the YouTube app. Once I test everything, I will create a new Group layer called Apps. I will place all my app images, overlay, and tap actions inside for easy management. Next, I will create a new Image layer that will hold the second overlay of the other dune with
the little camels. Fine-tuning the size of the layer comes a bit later. Before that, I will create yet another layer for the calendar. Instead of a full calendar, I will go to the Calendar tab and choose Compact mode, which is essentially the weekly calendar. Then I will resize it a bit, and from the layers tap, I will place it below my second overlay dune to simulate the depth effect. Then I’ll go to the Calendar tab again and I will change the font and colors to my initial design. I am using the Antonio font in bold
for the days and the regular width for the dates. Everything is in black with a 20% shadow to add a bit of depth. Finally, I will change today’s symbol color to light grey. Next is adding the current outside temperature. I will add a new text layer. From the last Data tab inside the layer, I will choose Weather (Now), and I will select Feels Like Temperature. Widgy takes that information directly from the weather app. I will position the temperature closer to the final spot and from the Text tap, I will style the text accordingly. I ended
up using the DIN Condensed Bold font in gradient black with again a 20% shadow. From the Text tab, you can scroll down to disable the show unit feature, which will remove the Farenheit or Celcius text. Once I am happy with the positioning and aesthetics of the temperature, I will add a new Symbol layer to represent the outside conditions. From the Symbol tab, select Apple SF Symbols and scroll down to find the Weather now symbols. I will choose the solid fill symbol and give it a solid color by picking the brown from the sand dune. Then,
I’ll give it a 20% shadow again and position it slightly over the temperature text for added depth effect. I will combine all wether layers into a group folder for maintenance purposes, and with that, we are almost ready with the Widget. Well, almost! I will need to add tap action layers for both the weather and calendar and lead them to open the respective apps. Time to create the action layer. For a start, I will add an image layer that is the black bar. Initially, I made the black bar with transparent rounded edges. Still, later I figured
I could simply use a normal rectangle and add rounded corners – like we did the icons on the bottom. To do that, you can go to the Effects tab and give the black bar Edge Rounding of 50%, which is the maximum in this case. Next, I will create four text layers that will read the quick actions that I most often use – home, new task, play music, and AirPods. Nothing complicated here. Simple text, using the Antonio font and proper spacing and positioning. On top of the 4 text layers, I will place 4 tap action layers
for each action. The first tap action opens the home app. The second tap action triggers a shortcut that creates a new task in my to-do app, the third triggers a shortcut that plays apple music, and the last triggers a shortcut to connect my AirPods to the iPhone. I will explain all four shortcuts in my Sunday newsletter, so make sure you are subscribed to it. I will place the links for my newsletter up top and in the description below. To finish the Widget, I will add the last overlay, an image of Clouds that I drew. Add
this image layer and resize and position it to your liking. It should be on the very top of all the layers. In my case, I stretch it pretty much across the entire Widget. With that, the Widget is ready, and I think it looks fantastic. When developing apps or, in this case, this Widget, I often use a systematic exploration approach, which is a handy problem-solving technique in computer science. Brilliant’s course on Computer Science Fundamentals helps me become a better thinker. A great example from a recent lesson I took is the city of Königsberg which had seven
bridges connecting two river islands in the city’s heart. This arrangement made many wonder if it was possible to walk across every bridge exactly once (starting anywhere in the city). See, in computer science, computers can check possible solutions for lots of problems very quickly and don’t get frustrated when the first few million don’t work out. If you want to learn the fundamentals or strengthen your knowledge of core computer science concepts, check out this Brilliant course and the thousands of other lessons, with exclusive new content that Brilliant ads monthly. You don’t have to spend four years and
a fortune to understand this stuff. To get started for free, visit brilliant.org/thisise or click on the first link in the description below. The first 200 of you will get 20% off Brilliant’s annual premium subscription. So, there are a few ways you can customize this Widget. First, you can enable and disable components to your liking. Since we grouped and named all layers responsibly, this takes just a second. For instance, you can hide the entire action bar, or the calendar, or the weather portion. If you’d like to change any of the 4 icons, you have to find
the images of your desired icons. I have icon packs on my store, by the way, or you can simply google them. Make sure they are square and preferably sized 1024×1024 pixels. Then, go to the image Icon of the one you want to swap, get inside and from the Image tab, go to System, Files and locate the icon you have prepared. Don’t forget to change the Tap Action for that icon. Open the Tap Action you want to change, then open the Action tab and choose from the list of Apple apps or 3-rd party apps, or even
Shortcuts if you know how to use them. Feel free to tweak the positions of the elements to your liking. If you are into a more flat look, feel free to hide the overlay layers by just tapping on the little eye icons beside each layer. If you enjoyed this video, check out my initial Ultimate iO16 home screen widget, where I cover more than just the Widget. We talk about organization, widget stacking, and more. Like and subscribe to the channel as well as my weekly newsletter if you want to learn how I use my shortcuts, and as
always, it’s been an absolute pleasure, This is E Over and out.