FIFINE USB Microphone K678 Review – Best Budget USB Microphone?
Hey guys, in this video we’re going to be
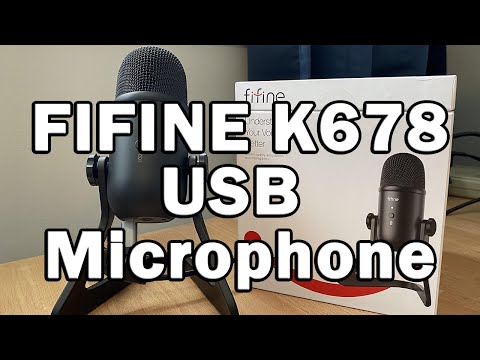
checking out the Fifine K678 USB condenser
microphone. This is a microphone that you
can use for gaming, voice over, podcasting
or singing. In this video we’ll check out
how to get the microphone setup with our computer,
and then we’ll go over some audio samples
to see how it sounds. Before we get started
though, I’d like to mention this microphone
was provided to me by Fifine for review, and
if you want to get one for yourself check
out the links in the video description down
below. While you’re at it you can subscribe
to the channel that way you can see all our
new videos whenever they’re released.
To get started with the unboxing, I’m quite
pleased with how Fifine has presented and
packed this product. In the box we’ll see
we have our instructions at the top, and then
we have the microphone, a little adapter to
connect it to a microphone stand and a USB
cable to connect it to our computer. All we
have to do to connect it to the computer is
tilt the microphone, plug in one end of the
cable to the bottom of the microphone and
the other to a free USB port on our computer.
make sure the Fifine K678 is the audio device
for both the microphone and the audio output.
As far as mounting options for this microphone,
we can either use the include stand, or there’s
a screw in adapter in the bottom that can
allow it to connect to any microphone stand.
As an alternative to that, we can probably
use a shockmount that can come with some different
microphones to mount it, but that’s not
included with this. The shockmount would allow
less noise to be transmitted to the microphone
if we’re doing things like typing, and that’s
really the only problem I’ve had with this
microphone so far. If we’re typing on the
computer or playing games with this microphone
while it’s on, we can get some of those
vibrations transferred into the microphone
and creating this very low pitched booming
sound. I’ll show you what that sounds like
right now.
One reason to get a USB microphone like this
is that it’s complete standalone, which
means you don’t need to use a USB audio
interface to connect the microphone and it
just connects directly to USB and works on
its own. We can record with the microphone
like this and play back all our sound through
only the microphone. For features with this
microphone, we have a built in stand with
adjustments for the position. To adjust it,
all we have to do is loosen the knobs on the
side, move the microphone to the correct position,
and tighten them back down to lock the microphone
in place. The front of the microphone has
an LED indicator that tells us if the microphone
is on or it’s muted. When the LED light
is green, that means the microphone is active
and that we can record sound through it. When
the LED indicator is red, that means that
the microphone is muted. To change this, just
press the circle button right below the LED
indicator. The back of the microphone has
two knobs; the top knob is used to control
the microphone level and that’s the recording
level that we’ll use, the bottom knob is
just to control the headphone volume level.
On the bottom of the microphone we have the
USB connector, a 3.5 mm headphone output to
connect any set of headphones to, and a different
type of mount adapter that way we can use
this with a microphone stand. The other thing
that I’m impressed with from this microphone
is the built quality; the whole microphone
and the stand is made out of metal instead
of plastic so it does feel quite sturdy.
As far as the sound quality on this microphone,
if you have it positioned correctly it is
quite good. The voice through it is really
clear and easy to hear. One of the most important
things about getting the correct sound out
of this microphone is making sure the position
is correct. This is a cardioid microphone
which means that the microphone picks up sound
directionally from just in front of it. It
kind of tries to block out sound that’s
coming from behind as well. To get the microphone
in the correct position, we want to make sure
the LED light and the mute button is on the
front, and the knobs are on the back. If we
turn the microphone around, we’ll notice
that it starts to exclude our voice and it
sounds like we’re quite a bit more distant
from the microphone as if we’re talking
to it from across the room. That’s not really
the right sound quality we want and that’s
why we need to make sure that the microphones
in the correct position. In addition to that
it’s also important to make sure that we’re
not too close to the microphone as that can
make the sound too muffled or that we’re
not too far away from the microphone as that
can make it hard to hear as well. As far as
making sure the microphone is in the right
position, I’d recommend putting it on the
desk in front of you at about 6 to 8 inches
away from your face. If you have the microphone
across the desk, it’s going to sound like
you’re quite far away, kind of like this,
and this isn’t the best sound quality we’d
want out of this microphone. If we were to
leave it like this it would pick up too much
room noise, so instead to get a clear sound,
make sure you’re in close to the microphone.
To get the sound right we’ll want to dial
in the microphone knob on the back. If we
have the volume set too high, then the microphone
will start clipping and sound distorted like
this. There’s no way to fix this after we’ve
recorded it so the solution is to just make
sure the microphone level is appropriate to
begin with. Otherwise if it’s too low it
can be a little bit too hard to hear us and
we won’t be able to use that signal level.
I usually use the microphone with the signal
level right about in the middle right here,
that way it’s easiest to hear.
One thing that I was a little bit concerned
about before using this is whether or not
I’d need to use a pop filter with the microphone.
It does sound like it’s properly got this
built in so if we’re making sounds with
like a p sound, like a p, p, p , there’s
not much sound or popping that gets picked
up by the microphone. One of the things I
was wondering about before I got this microphone
would be how much hiss there was from it.
Some low quality microphones can have a lot
of background noise but it doesn’t seem
to be a problem with this one at all. There
is a little bit of hiss with the headphones,
but at a reasonable level when you’re just
listening to videos or something on the computer
I haven’t had a problem with that, it’s
mostly when the headphones are turned up all
the way.
As far as my overall impressions I do think
this is a good quality microphone for the
price. It’s clear and easy to use, it has
a headphone output, and both knobs to make
adjustments, as well as the mute button to
mute ourselves for convenience. This microphone
is probably best for people that are doing
voice over, working from home and need a microphone
to be heard clearly or for gaming if they
want to make sure that their friends can hear
them without having to use a gaming headset.
If I had any criticism about this microphone
at all, the only thing I’d be concerned
about is the fact that it does pick up quite
a bit of vibrations if you’re typing on
a keyboard. So if we have sound going down
below we can hear that our fingers are tapping
and this low frequency is transmitting through
the microphone. That can be annoying for other
people to hear, and if we’re not typing
then it’s not an issue, otherwise we can
just mute the microphone when we are typing.
As far as quality and features, this microphone
can compete with other microphones on the
market and it is quite the good value for
what it does. I’d also like to mention that
all the audio you’ve been hearing for the
voice over in this video was created only
using the Fifine K678 condenser microphone.
I haven’t added any additional effects like
compression, equalization or noise reduction
so what you’re hearing in this video is
exactly as it sounds coming out of this microphone.
Thanks for checking out this video on the
Fifine K678 USB condenser microphone. If you
liked this video, don’t forget to check
out the links in the video description as
well as our social media links to check out
all our recent videos. You can also give this
video a like and subscribe to the channel
to make sure you see all our new content.