Unboxing, Review and Tests – MangoPi MQ Pro
hello everyone
recently came out on reputable hardware websites
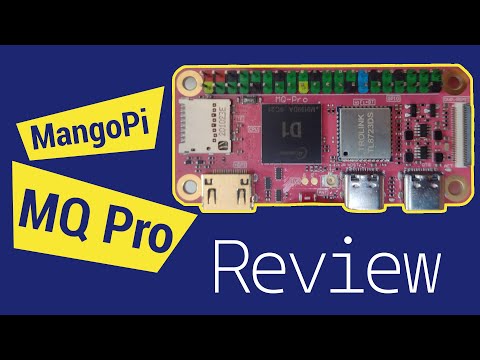
the release of the MangoPi MQ Pro board
that promises to face the Raspberry Pi Zero W board, with an additional
the fact that your processor is RISC-V architecture
the board has an Allwinner D1 processor
the same as the Sipeed Lichee RV board with its dock, which I already presented on this channel
I will talk about it later
the board has a 40-pin GPIO header, in the Raspberry Pi standard
microSD card slot
wifi and bluetooth via the RTL8723ds module, with a connector for an external antenna
the board offers the possibility of connecting via ethernet
but you need to buy an expansion board
that has not been released yet
the board has two USB Type-C outputs
being one of them OTG and the other one host-type
the board has a connector for DSI displays
I found the flat cable connector lock to be very fragile when handling it
HDMI mini connector for video output, which is the first time I have seen in my life
connector for DVP cameras
I also found the lock for its flat cable fragile
the board has stereo audio output
but you will have to solder the wires on these
that are very close to these resistors
and also close to the processor
which is on the other side of the board
the board is sold in versions of 512MB of DDR3 RAM memory
which was the case of my purchase
or 1GB DDR3
the RAM that came with my board is from Kingston
I didn’t mention it in the Lichee RV video
but the RAM memory that comes in your Compute Module is from SKhynix
making a brief comparison with Sipeed’s Lichee RV dock and its Compute Module
I would say that it has some advantages over the MangoPi MQ Pro
the HDMI connector is full size
the board comes with a built-in microphone
user button, reset button
Sipeed also distributes a Debian image for its board
for now, the Debian image for MangoPi MQ Pro is still under development
USB output is type A, which makes it easy to connect peripherals
like keyboard, USB mouse, flash drives…
and a connector
notice, an audio output connector for speakers
despite this, the boards have very similar configurations
and their prices are also similar
the board took a long time to arrive here in Brazil
because it was first offered in the Chinese domestic market through taobao
which is a maketplace from China
I had to wait for a seller to offer the board on AliExpress
even so, the only seller that at the time offered the product
didn’t have it in stock
the order was placed and paid on April 14, 2022
and the product was dispatched for shipment on May 31, 2022 only
almost that the purchase was canceled by the AliExpress shipping deadline
despite everything, the product came very well packaged
stickers came in case you want to advertise MangoPi for free
and a set of 40-pin headers with Raspberry Pi standard color indication
to start using, I downloaded the image of the only distribution offered for the board
from the manufacturer’s website: Tina Linux
through this link
to flash you will need the PhoenixCard
which is proprietary, closed-source software by Allwinner
that only works for Windows
it is necessary to flash images in .img format to boards with their processors
in the Lichee RV video I show how to use this tool
one thing that caught my attention in this closed program
is the need to give root permission to flash the card
without further ado, let’s get to the image flash
the process takes a few minutes
take the microsd card out of its adapter and put it on the board
then take a USB to UART converter and plug it into the UART0 output of the board’s GPIO headers
according to this diagram
using your preferred serial console
connect the serial port of the converter at the speed of 115200 baud
as well as Sipeed Lichee RV’s Compute Module
only the power supplied by the UART converter itself already powers the board for its boot
as we can see, we already have the Tina Linux boot on the board
unfortunately I was able to do few tasks
with what the operating system offered in the image
I was able to connect the board to my local wifi network
through wifi_connect_ap_test binary
but before that, you need to initialize the wpa_supplicant service
which is turned off by default at boot
I also found a telnet service, which I will talk about later
let’s open the wpa_supplicant service to connect to the network
it is important to say that, given the start of the wpa_supplicant service
the serial console will be constantly interrupted with service log messages
but it is possible to use the console normally, although it is an unpleasant experience
now let’s connect to my local wifi network
through wifi_connect_ap_test binary
just use this syntax to connect to the local network
and here is the output of ifconfig after connected to my local network
I will test the internet connection through wget
unfortunately the wget that comes in the image
can only download files
over common HTTP and common FTP protocols
so I found a file on an FTP server on the internet to download
that I left written in this text file
let’s copy the link and run the command in the Tina Linux shell
wpa_supplicant logs make it very difficult to read the terminal
but you can see that wget was able to download
the file from the internet FTP server without any problems
opening the text editor we can see its content
the vim text editor came by default in Tina Linux
using wget help we can see its limitations
see, only common HTTP and common FTP protocols
I tried to find a ssh server in the image but I didn’t find anything
then I remembered I had a telnet service in the image
I decided to look for to run it to access the board remotely
as we can see we found the telnet service of the board
before running it, let’s check its options
we can see it’s a simple service, let’s run it
here we can see that the service is running
here we can see the open ports
despite knowing they are not the default telnet port
I tried to access them all through my telnet client without success
then I tried to open port 23, which is the default telnet, through iptables
however, the tina linux kernel does not allow at all to open ports
or create network interface rules
this was my initial experience with the MangoPi MQ Pro
thank you all for the attention
see you next time!